
How to Print Cheque Date in MMDDYYYY Format in Dynamics GP
If your company needs to print physical cheque with the cheque date in the MMDDYYYY format, you will need to customize the cheque report in GP. In this article, we will use Check with Two Stubs on Top as an example. The steps listed below can be applied to other reports using similar date format in Report Writer.
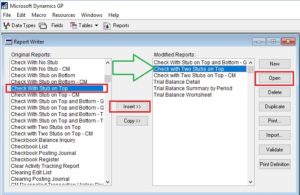
In GP, go to Tools – Customize – Report Writer – Reports – Select Check with Stub on Top from the Original Reports – Insert it to the Modified Reports – Click Open
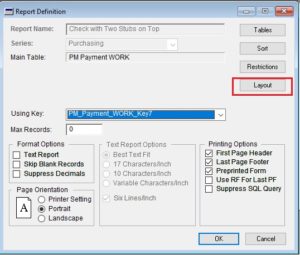
Click on Layout
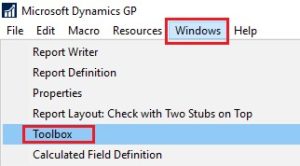
The Toolbox window should pop up. If you could not find the Toolbox window, it can also be opened from Windows – Toolbox
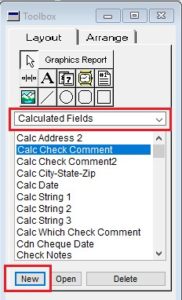
Within the Toolbox window, select Calculated Field then click on New
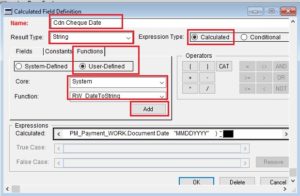
In the Calculated Field Definition
- Enter name: e.g. Cdn Cheque Date
- Select Result Type: String
- Select Expression Type: Calculated
- Click on Functions tab: Add User-Defined function named RW_DateToString
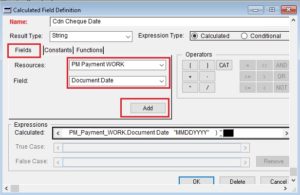
Click on the Fields Tab: Add field Document Date in the PM Payment WORK table
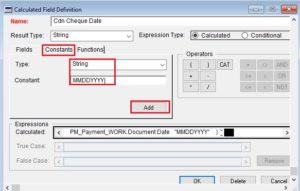
Click on the Constants tab: Add String Constants MMDDYYYY (The date format can be in any string constants, e.g. “MMDDYYYY”, “MM-DD-YYYY”, “MM/DD/YYYY”,)
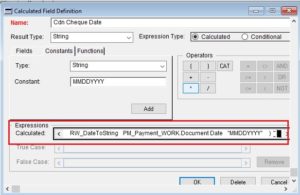
 Now verify Expressions Calculated, it should show
FUNCTION_SCRIPT(RW_DateToString PM_Payment_WORK.Document Date “MMDDYYYY”)
Advanced Topic
If you would like to print date into boxes like below:
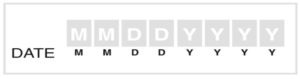
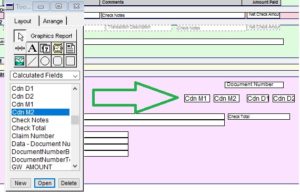
You will need to parse the calculated filed “Cdn Cheque Date” from the format of “MMDDYYYY” into each individual calculated field then drag them into the box position one by one. Here is the list of the new calculated fields need to be created.
Add Calculated Fields
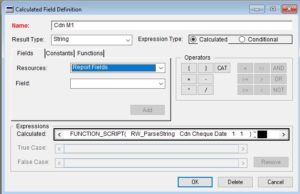
- Cdn M1: FUNCTION_SCRIPT( RW_ParseString Cdn Cheque Date 1 1 )
- Cdn M2: FUNCTION_SCRIPT( RW_ParseString Cdn Cheque Date 1 2 )
- Cdn D1: FUNCTION_SCRIPT( RW_ParseString Cdn Cheque Date 1 3 )
- Cdn D2: FUNCTION_SCRIPT( RW_ParseString Cdn Cheque Date 1 4 )
- Cdn Y1: FUNCTION_SCRIPT( RW_ParseString Cdn Cheque Date 1 5 )
- Cdn Y2: FUNCTION_SCRIPT( RW_ParseString Cdn Cheque Date 1 6 )
- Cdn Y3: FUNCTION_SCRIPT( RW_ParseString Cdn Cheque Date 1 7 )
- Cdn Y4: FUNCTION_SCRIPT( RW_ParseString Cdn Cheque Date 1 8 )
Then place the above fields in the report layout to the corresponding position
And now back to the regularly scheduled tutorial of how to set the cheque date format to MMDDYYYY
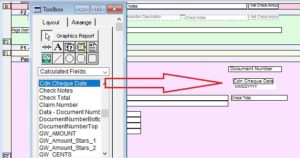
Click OK to save then drag this newly created date field to the corresponding position on the report layout
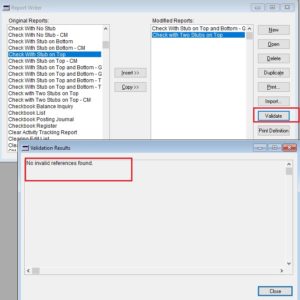
Save all the changes and close the report definition window. Then click on Validate to be sure No invalid reference found.
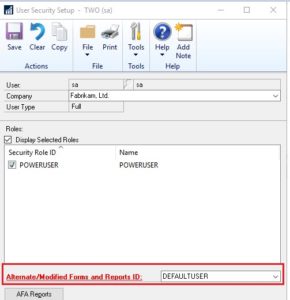
To allow user to use the modified reports while printing cheques, you must give user access to use this report. To do so, go to GP – Administration – User Security – Select User ID – Select Company – Alternate/Modified Forms and Reports ID
Select Product Microsoft Dynamics GP – Select Type Reports – Select Series Purchasing – Under Purchasing Check with Two Stubs on Top select Microsoft Dynamics GP (Modified)
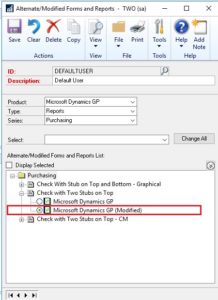
Click Save, now the modified cheque format is ready for use!