GP Workflow Overview and Setup
Background
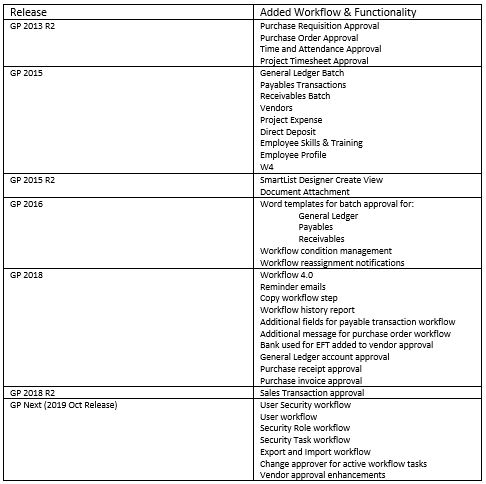
Workflow 2.0
Workflow 2.0 was introduced to GP users with the release of GP 2013 R2. Workflow 2.0 supports employee self-service and involves a variety of business logic steps linked to Active Directory and other GP approval infrastructure. Notifications via e-mail or GP notifications are available to notify, review, and, approve or reject with specific requests.
The workflow setup was included in GP instead of prior workflow system via SharePoint. Workflow 2.0 also provided remote approval functionality. The workflow web service which was integrated to GP web service provide the flexibility of approving requests through emails without the need to log into GP.
Workflow 2.0 provided functionally to escalate an overdue workflow step. This escalation functionality is supported by the Microsoft SQL Server Agent (SQL Server Agent is a Microsoft Windows service that executed scheduled administrative tasks). If escalation of overdue is required for your business, then ensure the SQL Server Agent is setup to start automatically on the GP server.
Workflow 4.0
Since GP 2018 release, the capabilities of workflow have been extended. In additional to new workflows, users can copy a step within a workflow and send reminder email from workflow.
What’s New
Setup
System Workflow Setup
In GP – Administration – Setup – System – Workflow Setup – Enable E-mail for Workflow

- Installed GP Web services before enabling E-Mail functions with Web Services
- For web service, use Internet Explorer 9.0 or later
Company Workflow Setup
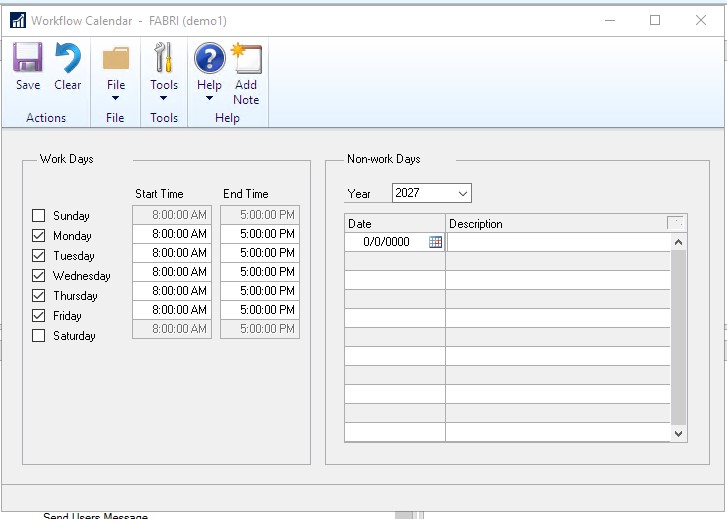
Workflow Calendar
In GP – Administration – Setup – Company – Workflow – Workflow Calendar – Specify your work days and Non-work Days which will be used to calculate the approval due time
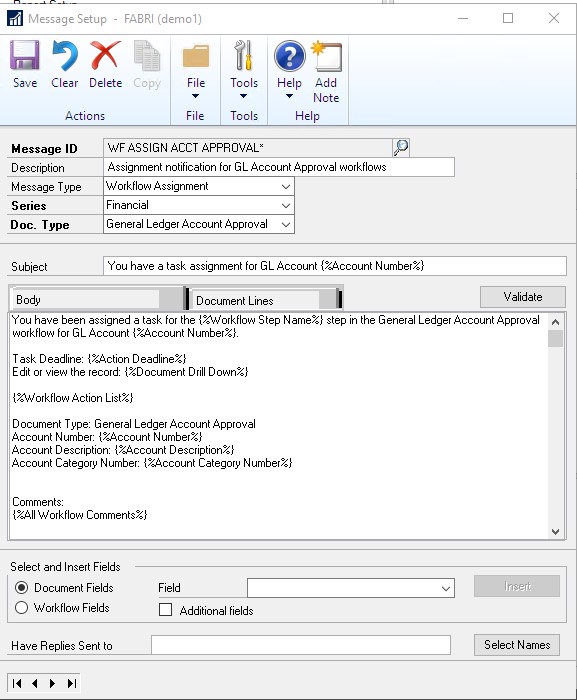
E-Mail Message Setup
In GP – Administration – Setup – Company – Workflow – E-Mail Message Setup
- If you GP User ID hasn’t create outlook profile in GP before, it will ask you to log into your exchange server
- Customized the message which will be sent to the approver in email
Workflow Maintenance
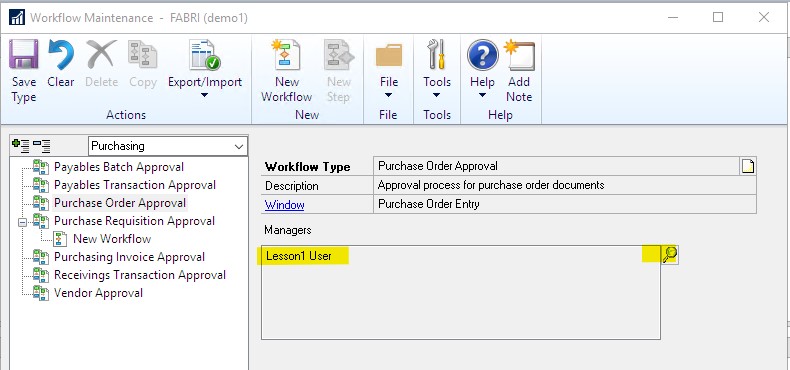
In GP – Administration – Setup – Company – Workflow – Workflow Maintenance
- Select Workflow Manager – Save Type
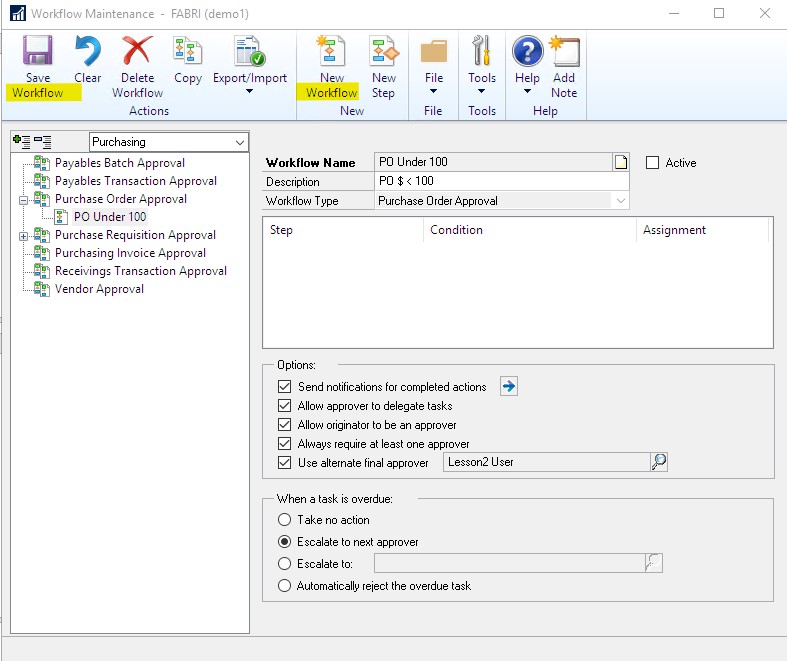
- Click on New Workflow – Enter Workflow Name – Description – Mark all applicable Options – select action when a task is overdue – Save Workflow
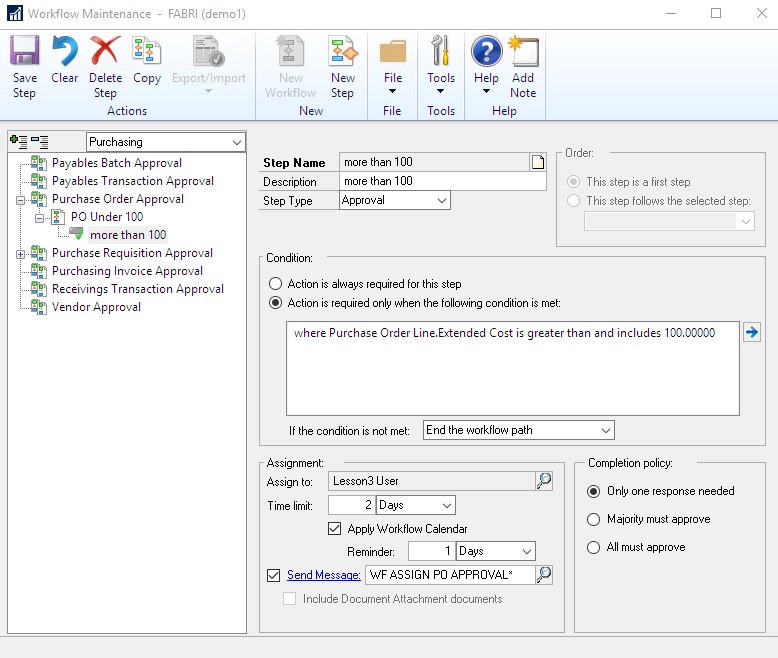
- Click New Step – Enter step Name – Description – select Step Type – Enter Condition – select what to do if the condition is not met – select approver – enter due time – check the message to send in email – If you need to include Document attached to the email make sure you refer to our blog which talks about how to enable document attachment in GP – select Completion policy – Save Step
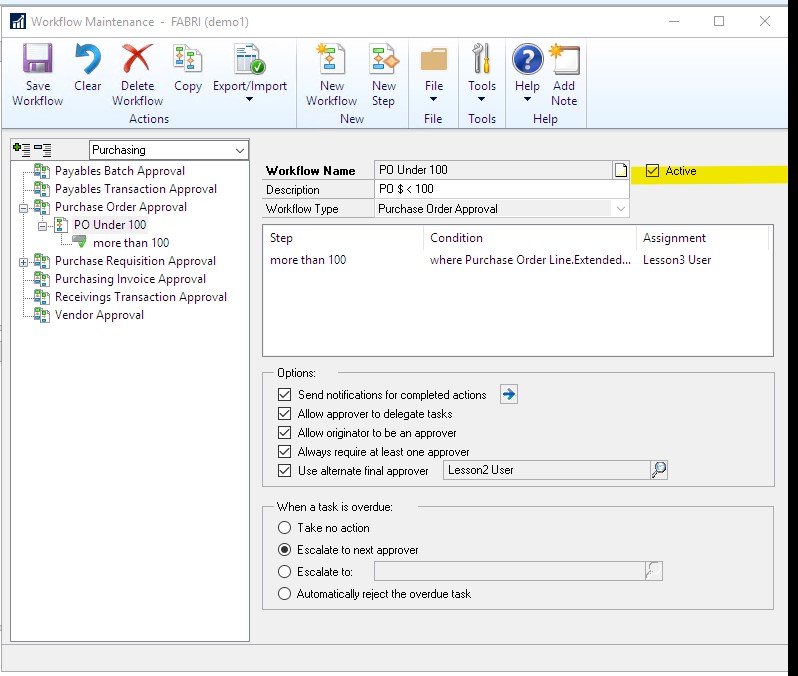
- Remember to Active the workflow, each workflow type only allows one active workflow – Mark Active – Save Workflow
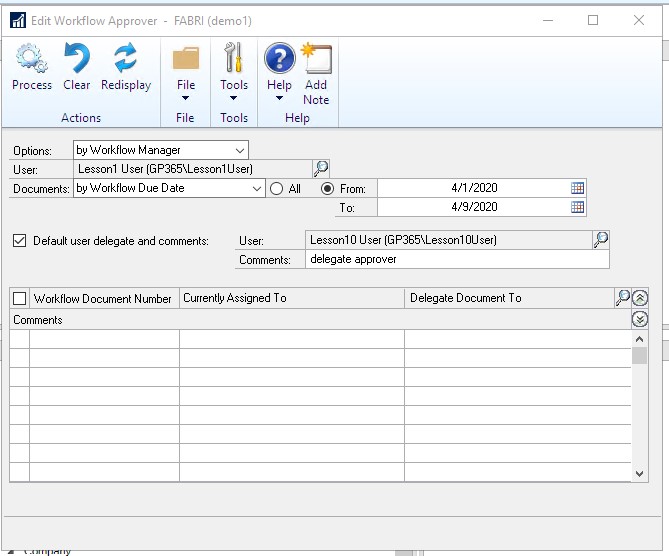
Edit Workflow Approver
In GP – Administration – Setup – Company – Workflow – Edit Workflow Approver – For example, when a user is out of office and need to delegate their approval task to their backup person, they can specify the delegate approver here – filter to pull out the Workflow document that needs to be delegated – mark the document number – Process
Use Workflow
For example, if you need to create a PO
- In GP – Purchasing – Purchase Order Entry – enter the PO details – Submit – Once submitted the workflow kicks in and the Workflow progress indicator (grey bar) will state who the PO is with – or you can also view PO workflow History
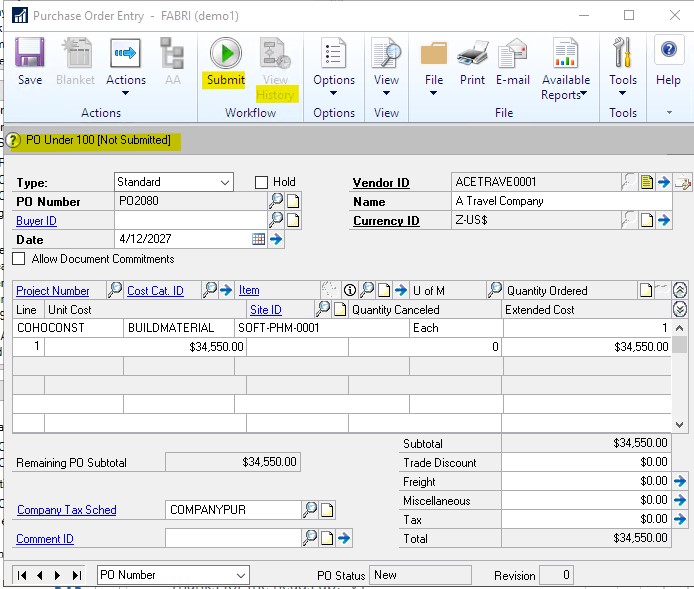
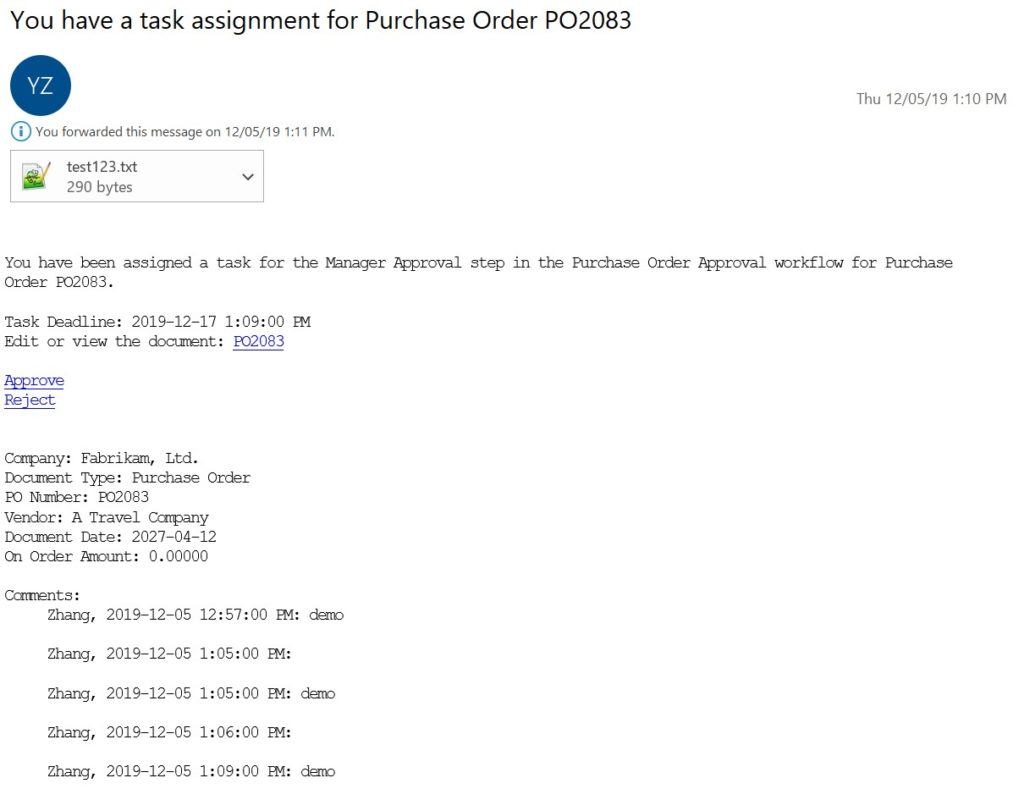
- Workflow approver will receive an email to take action by clicking on the link if web service is setup, or they can log into GP – Purchase – Purchase Order Entry – select the PO needs to be approved – Click on Approve – The Workflow progress indicator will state PO complete
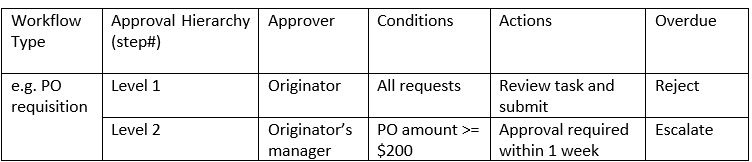
Analysis and Design workflow
Analysis and design always takes certain time pending on how complex the business process is. Usually we start with the below template then setup the workflow and steps in GP.