
How to Set up a Different EFT Formats in GP
Background
Electronics Fund Transfer (EFT) is one of the main features in GP Payables and Receivables Managements. GP has some predefined EFT format ready to setup. In this blog, we will discuss how to set up different EFT file format in GP.
How To:
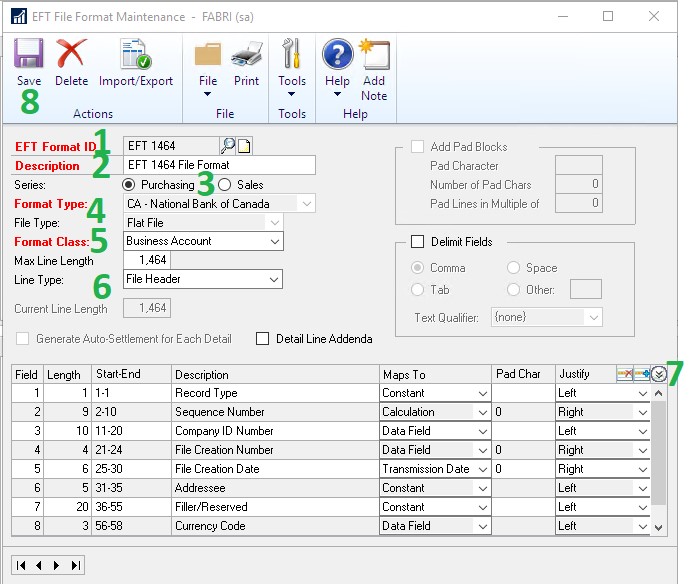
- Go to Financial Module – Cards – EFT File Format
- Enter your own format ID and Description
- Choose the series, Purchasing or Sales
- Select format type, the following are predefined EFT format in different bytes. Select the format required by your bank
- CA – Bank of Montreal – 80
- CA – CIBC – 80
- CA – National Bank of Canada – 1,464
- CA – RBC Royal Bank – 152
- CA – Toronto Dominion – 80
- US – NACHA-PPD – 94
- US – NACHA-PPD+ – 94
- US – NACHA-CCD – 94
- US – NACHA-CCD+ – 94
- IS0 20022-Domestic, Low-Value – XML
- User-Defined
- US – IAT NACHA – 94
- CA – Scotia Bank – 105
If none of the above meets your bank’s requirements, select User-Defined to set up your own EFT format
- Select the format class
- Business Account
- Corporate Account
- Personal Account
- Foreign Account
- Not Specified
- Start configuring each Line Type by referring to the EFT format guide provide by your bank
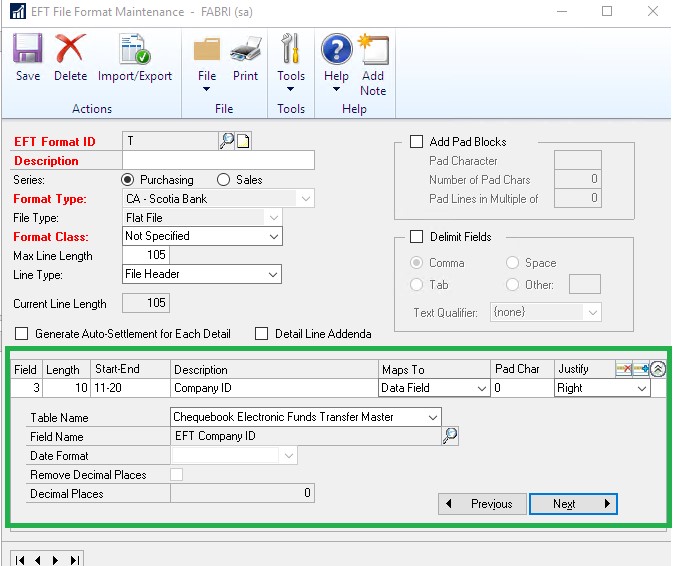
- Expand each line details to specify the configuration details
Click Save to save the format
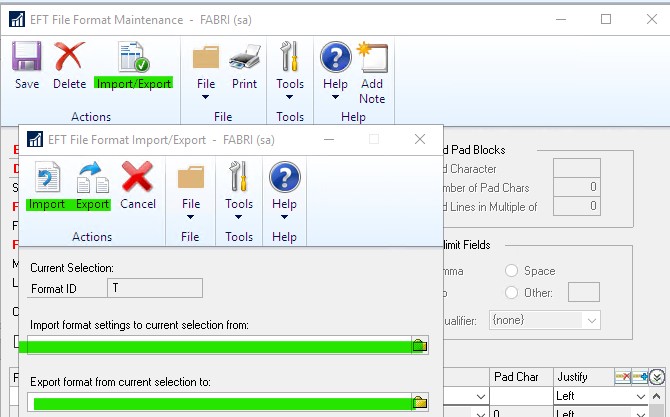
Import/Export to import previously saved format or export the new format to other GP companies
Now the newly created EFT file format is ready to use, in the next blog we will discuss how to use this EFT file format to set up EFT in a chequebook.
Thanks for reading! Make sure to follow us on Twitter, Linkedin, and Youtube @GP365 to ensure you stay up to date on our latest training sessions and blog posts.