
Dynamics GP Vendor Workflow Overview
In our previous blog post, we reviewed GP workflow. In the What’s New chart of that Blog, we listed out the workflow functions in each release. Vendor workflow was released in GP2015, so in today’s vendor series, we will talk about how vendor workflow can approve your vendor management process.
Background:
We often receive cases from our clients complaining that duplicate vendor records are created by different users in the team or vendor records that were edited by users unexpectedly. In many cases, they only find out after an invoice or payments were issued, which causes an additional effort to address the issue. GP security is one approach to control which user in the team can create or edit vendor records, but sometimes touching GP security could be a heavy task pending on your team setup. Not only that, GP security only controls the vendor maintenance at the user level. Vendor workflow is a very useful feature that enhances the control function during your vendor maintenance.
Workflow Setup:
We have already talked about how to setup workflow in the previous blog. If you missed it, check it out.
Setup:
In GP – Administration – Setup – Company – Workflow – Workflow Maintenance – Vendor Approval – Create the type – assign the Managers (mandatory)
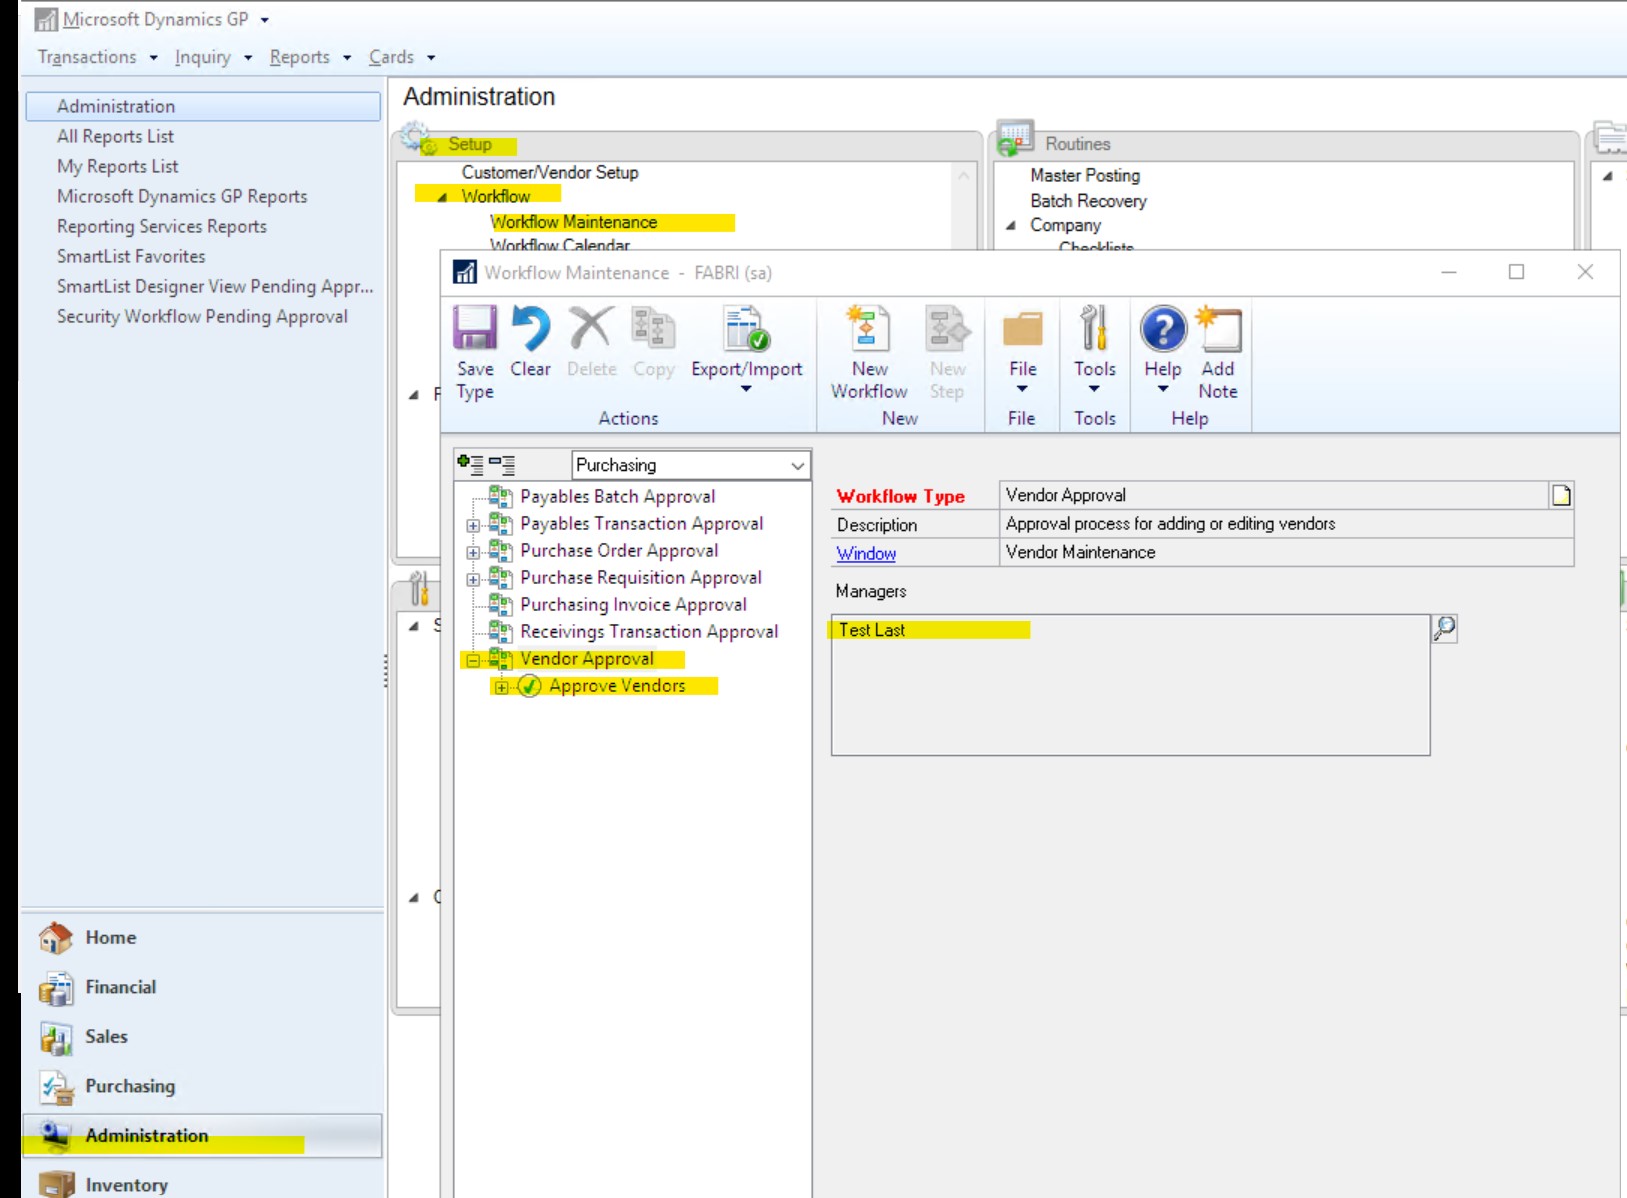
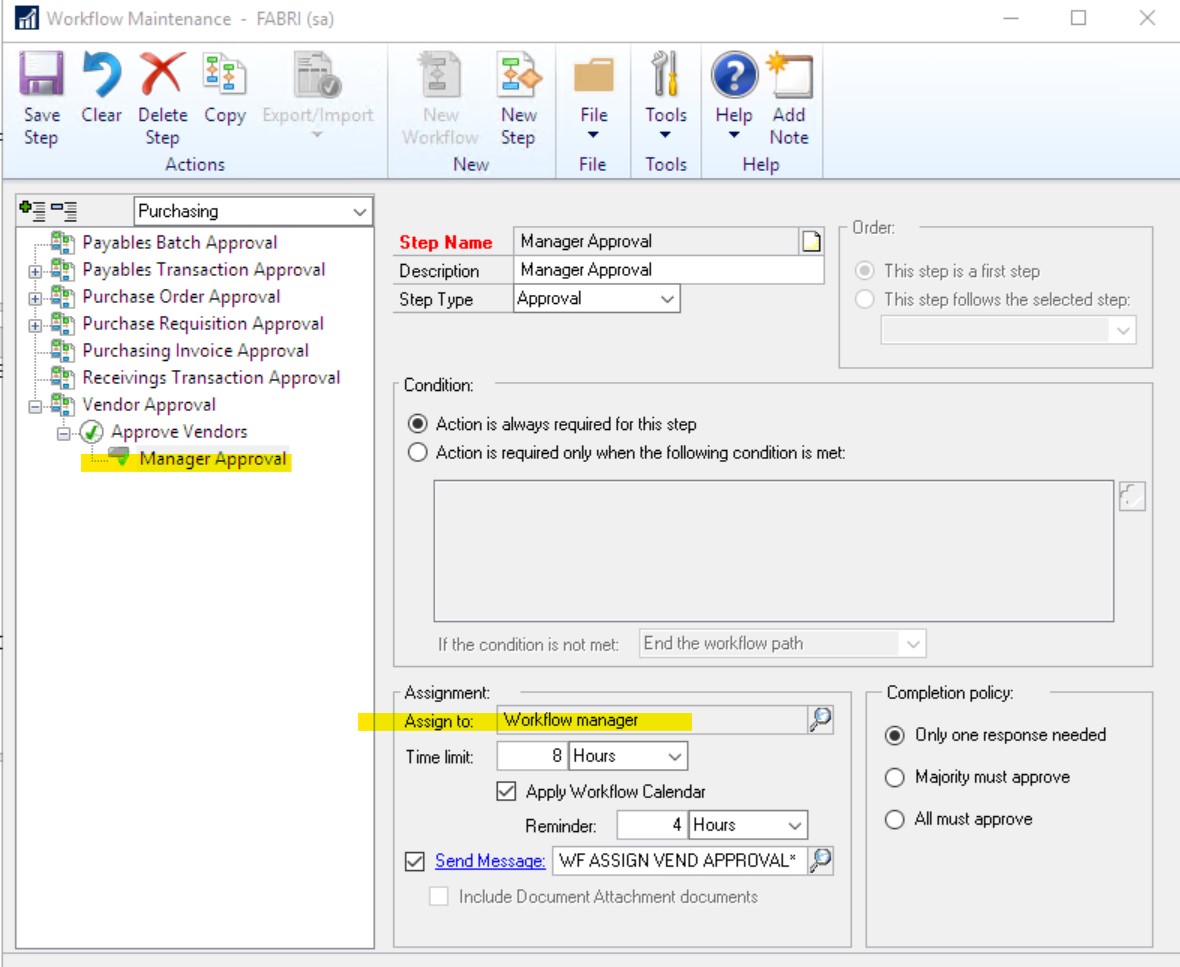
Add new Step. In this example, all vendor action would require workflow manager’s approval.
Usage:
If one user creates a new vendor or edits an existing vendor record, they will need to submit the request to get approved before they can use the vendor record.
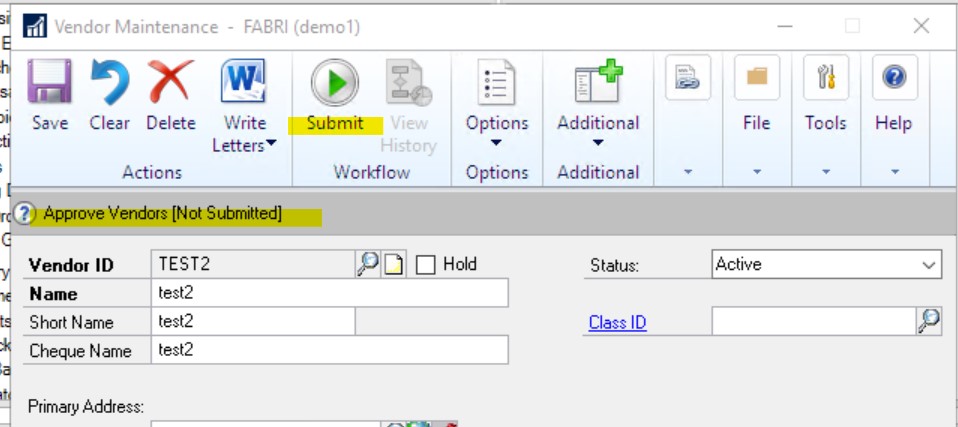
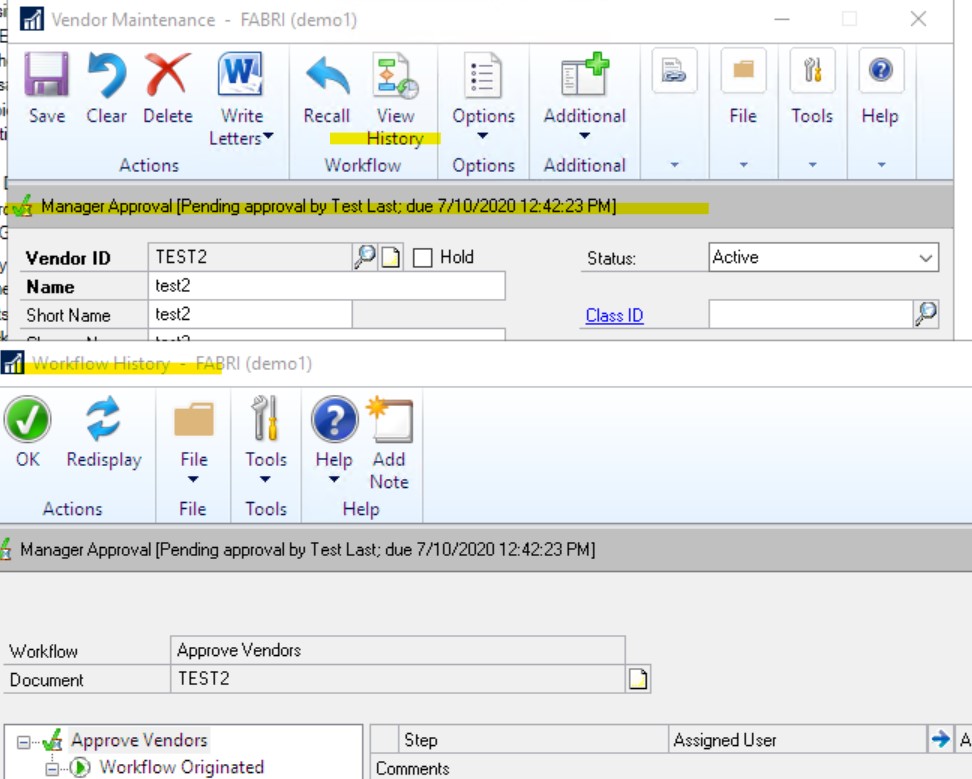
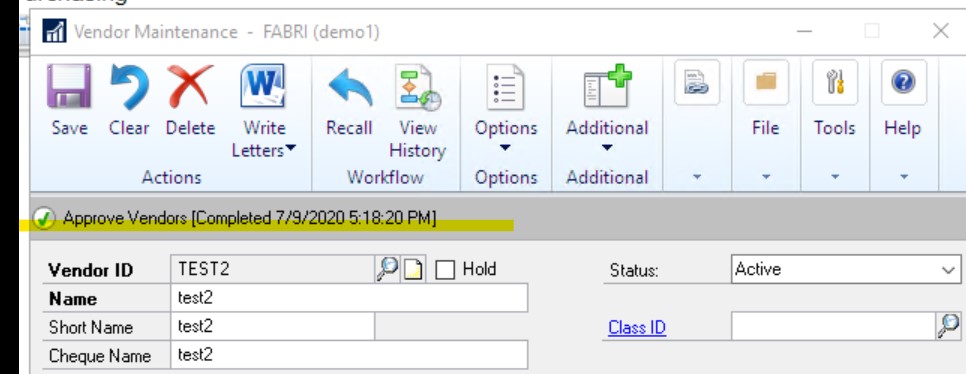
After the user submits, they can use the Status bar or View History to check on the workflow status.
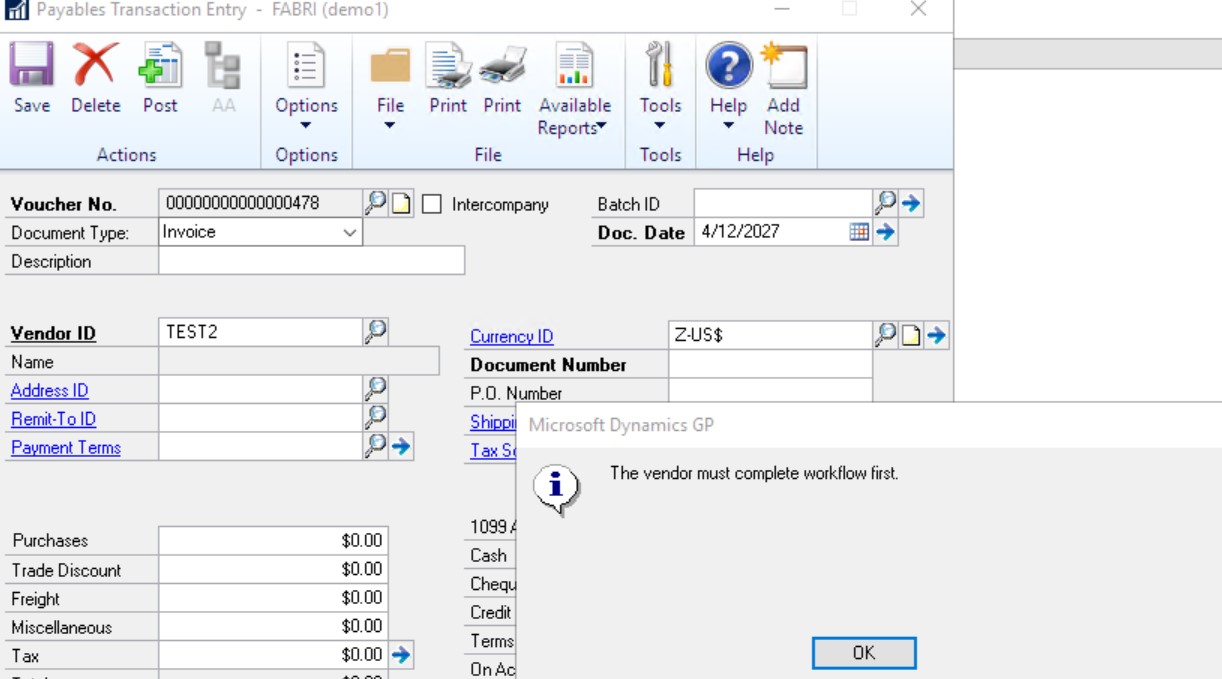
Before the approval is done, users won’t be able to use this vendor record. For example, when adding an invoice for TEST2, the below messages shows up.
Once the approval is completed the new vendor record is ready for use.
Once completed, if users need to edit and save the changes to this vendor, the workflow will request user to re-submit the change for approval.
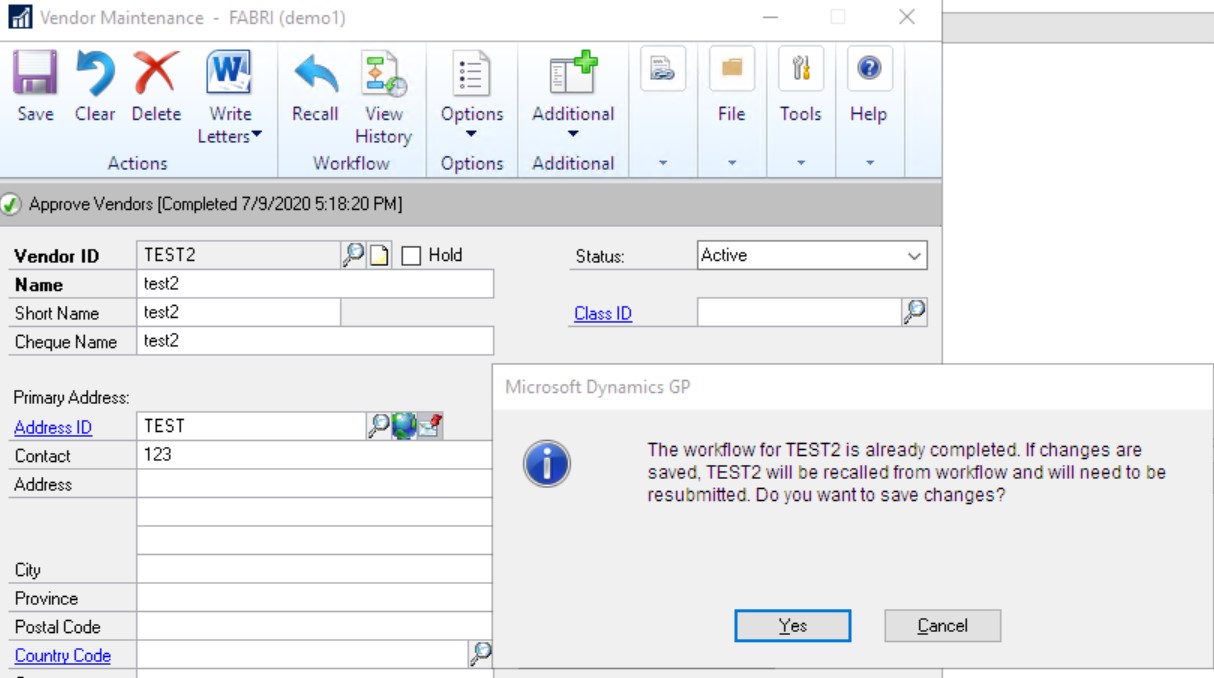
After the re-submit is approved, the changes will be in place. This prevents users from changing any vendor records such as cheque name or contact info without notifying approvers.
Advanced Control:
The above example shows that all vendor actions require approvals. What about if the management team only needs to approve certain types of vendors? Then, Workflow Condition can be added. For example, if I only want the manager to approve vendors assigned to FINANCE vendor class (my EFT vendors), then below conditions can be added.
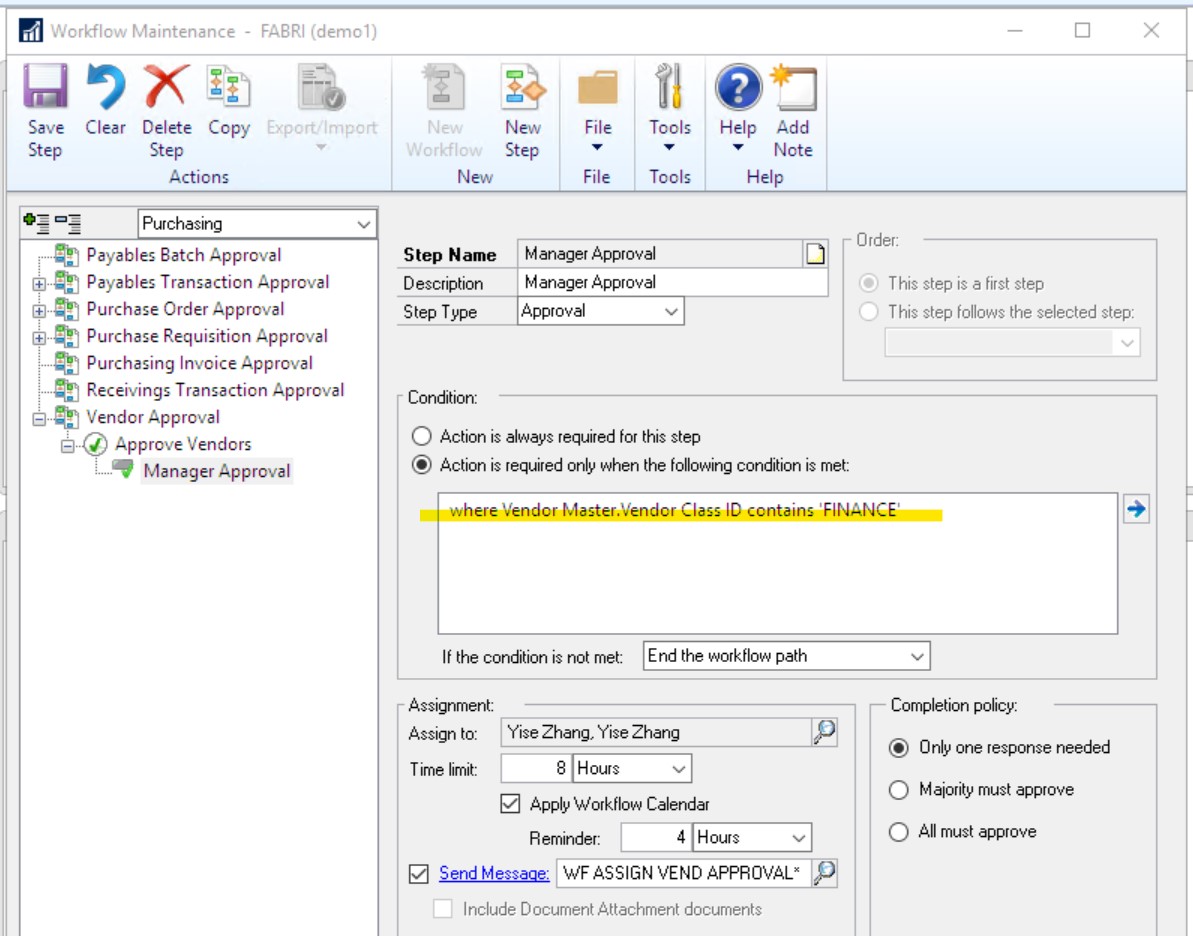
Again, pending business requirements, additional conditions can be added to enhance your vendor management process.
Thanks for reading GP365’s blog on vendor workflow. To stay up-to-date on our latest posts and events, make sure to like and follow our social media pages @GP365 on Facebook, Linkedin, and Twitter.