
How to Add Additional Tables to the Cheque Report in Dynamics GP
In part 4 of our GP Cheque design series we cover how to add additional tables to the Cheque Report. To better understand the topic, it’s recommended to review the earlier posts:
How to Print Cheque Date in MMDDYYYY Format
How to Add Asterisks to the Cheques Field
How to convert Dollar Amounts into Words
Background
Sometimes business needs to print additional fields on cheque stub but in report writer after you go through the available tables attached to the cheque form does not have the one your required fields are in. The solution of this is to have the additional tables added to this cheque form. In today’s blog, we will use two examples to show you how this can be done in report writer.
How To:
Example 1 – To add Invoice Notes to the cheque stub in Payables Management
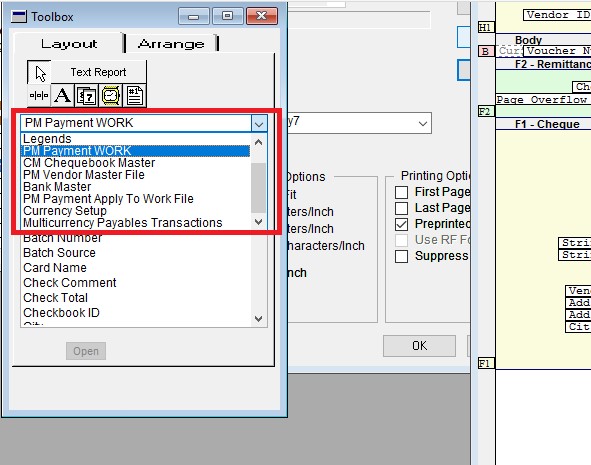
From the Toolbox’s drop list, we don’t see the invoice notes table
To add it to the drop down list
1. In Report Definition Window, click on Tables – Double click on PM Payment Apply To Work File
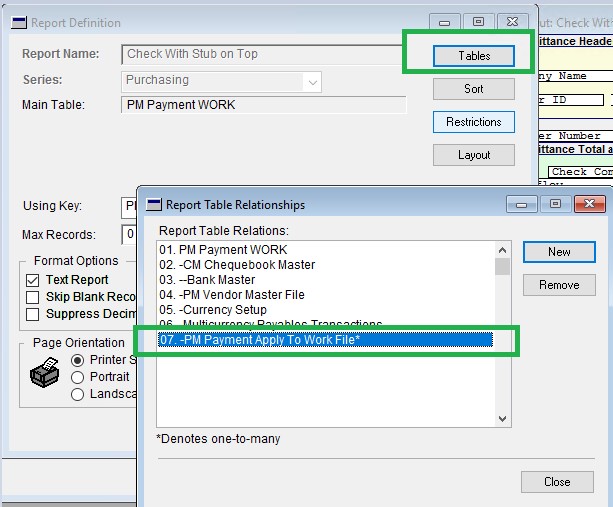
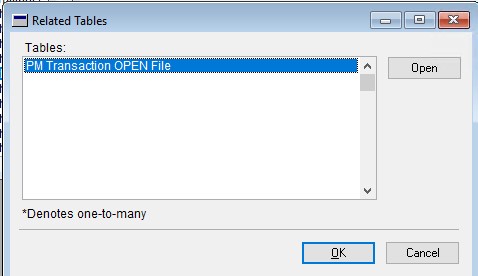
2. Open PM Transaction OPEN File
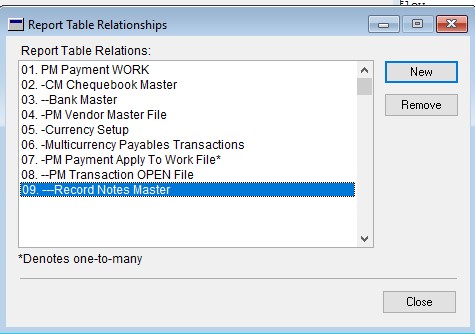
3. You will notice that the PM Transaction OPEN File is now added to the Report Table Relationships list. Next, double click on it, then open Record Notes Master
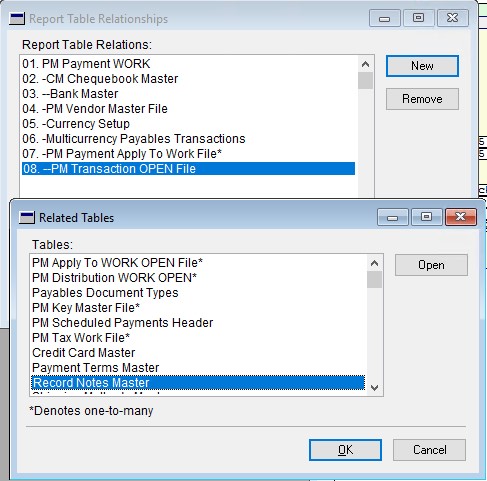
4. Now you will notice that Record Notes Master was also added to the table relationship list
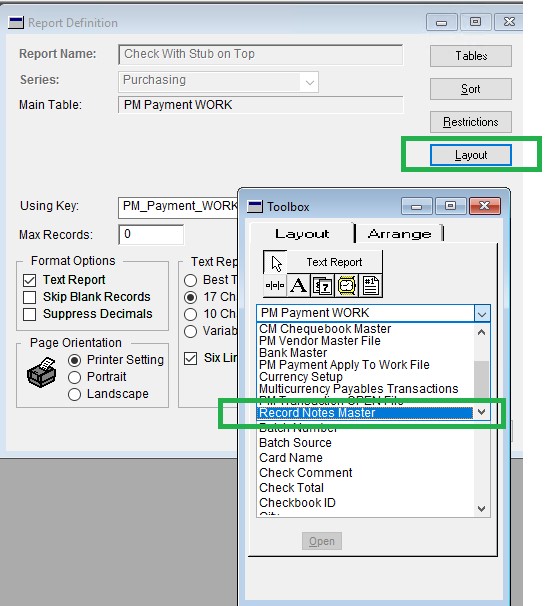
5. Let’s go to report layout and check the Toolbox, Record Note Master is available on the list.
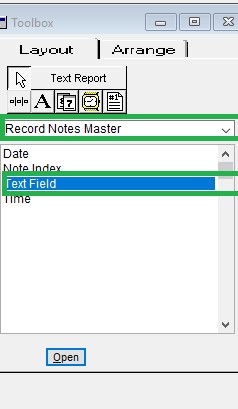
6. Now you can drag the Text Field to the desired location on the report
In the above example, we discussed the scenarios that the table relationship was built out of box and we just need to open each layer to add them to the toolbox list. What about after we open each table but didn’t find the relationship contains the table with the field, we are looking for? We will discuss how to establish this relationship.
***CAUTION*** – establishing new table relationships in report writer has the risk of messing up the existing relationships, so please fully test it in testing environment (must be a separate GP Instance, it cannot be the TEST company under the same GP instance as Write Report reports are used system wise) before rolling any changes into production. If you are not too sure whether the new relationship is okay, consult your GP service provider.
Example 2 – Add Invoice PO number to Check Remittance in Payables Management
In Report Definitions, open Tables, after browsing through the list, we only found table PM Payment Apply To Work File which does not have the PO number field and we did not find the PM Transaction Open File table which has the PO number field that can be added using the steps in the above example.
To establish a relationship between these two tables, follow the below steps
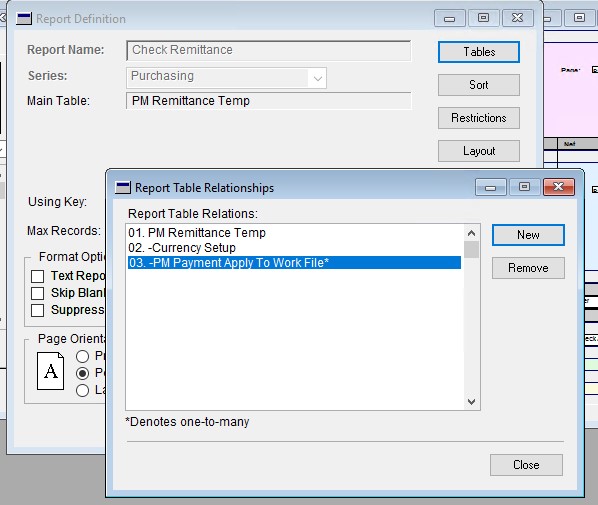
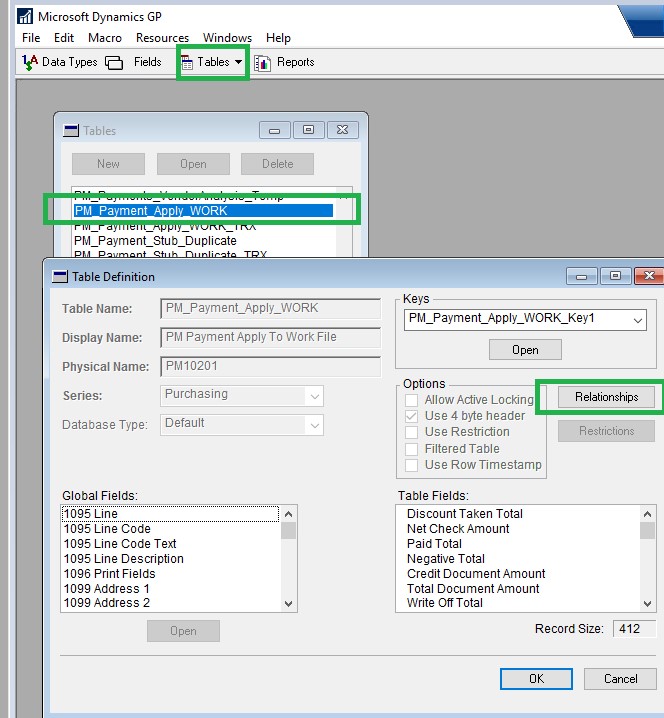
- Click Tables – Tables – Double click on PM_Payment_Apply_WORK – Click on Relationships
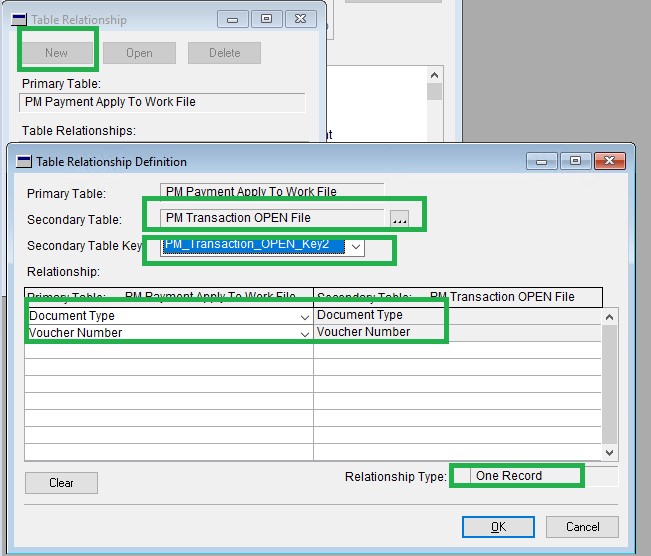
2. In Table Relationship window, click on New – Select PM Transaction OPEN File in Secondary Table – select OM_Transaction_OPEN_KEY2 as the key – In Relationship Mapp Primary Table’s Document Type and Voucher Number to Secondary table’s Document Type and Voucher Number respectively – You will notice the Relationship Type is changed to One Record
3. After clicking OK the relationship is setup. Repeat the steps from Example 1 to add the Purchase Order Number field to the report layout
